The 3D modelling object international workshop was of great inspiration for the computer science teachers from Colegiul National Emil Racovita. Having as starting point the international workshop, the teachers planned and implemented three lessons for the 5th and the 6th graders. The three lessons’ topics were: Editing operations of object properties: sizing, spinning, transparency, positioning (for the 5th graders), Designing a traffic lights (for the 6th graders) and Playing the Architect (for the 6th graders).
Below you can find the steps of the Designing a traffic lights lesson:
- 2-3 students present the information they have found related to resistors, LEDs, how to connect pins, etc
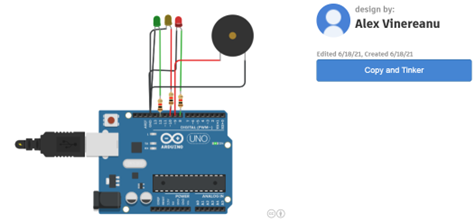
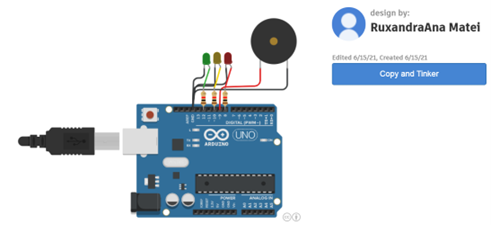
- The teacher suggests that the students design a traffic lights circuit in the circuit section of Tinkercad. While the teacher explains the steps with the use of the projector, students follow the same steps individually on their computers.
- Together with the students, the teacher analyses the Arduino circuit board and they decide on the pins where the 3 resistors (red, yellow and green) will be connected
- The teacher suggests that the traffic lights should make a sound when the lights turn green, so a student comes to the projector and completes the circuit with the aid of a piezo. The other students also complete their circuits.
- The teacher introduces the code that makes the circuit functional.
- The teacher checks and corrects any possible connection and programming errors, giving explanations individually if necessary.
What teachers say about the lesson?
- The students participated actively in all the activities, and they asked numerous questions.
- The students identified the codes from the source block.
- The students created the circuit setting a time interval for each color of the traffic lights.
- The students observed what happened when we changed the connection type: the anode to the grounding and the cathode to the pin.
- The lesson was interactive.